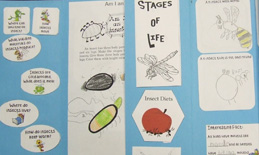
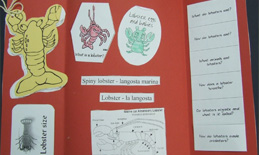
Once you understand what lapbooking is about, you need to get the wheels turning. Following are tips on where to start and things to think of when planning a lapbook:
First things first – General tips
- Encourage your child’s interest (be careful not to discourage) (Col 3:21)
- Remember that the lapbook is your child’s creation, not yours
- Don’t rush the process
- Always be patient and encouraging
- Handle it gently and take small steps
- Make sure your child understands what is expected
- Make the whole lapbook a fun project
- Assist with the paper folding and cutting
- Offer advice and allow your child to make decisions – Have your child decide where he/she wants to place the information (mini-books) inside the lapbook
- Remember that the lapbook is about what the child knows, not about what you remind him about what he has learned. This develops thinking skills and may take some time to get used to
- Decorating the lapbook – again, lead the child into thinking for himself – ask him how he would like to illustrate (show) what he has learned – would he like to draw or color a picture, etc.
- Writing should be no less than one sentence per year that the child has been schooling (so if its his first year, he will write one sentence), this can include copywork or dictation (where you read and he writes what he hears you say)
- Determine how much time you want to spend on this lapbook (this will come in handy to plan how much to do every day)
- Take a picture of your child with his/her completed project (include it in the lapbook)
I have compiled a form you could use in compiling a lapbook that includes all the tips mentioned in the rest of the article. You can download it here.
Starting a lapbook
- First of all you need to decide what you want to study. Sometimes the starting point to this is asking the child what he wants to learn about. Other times you decide on a subject, and find books about the subject. Then you will go on breaking the subject down into topics.
In deciding on topics for your theme, you should determine what your child already knows, and then what he would like to learn about the theme (what interests him). When the lapbook is complete, you can have a discussion about what your child knows now after the study that he didn’t know before, and what he would’ve liked to learn (things that might have been skipped) if you were to do the study again. This may result in an extended study on your theme/book. You can see how this will affirm the information learned. A lapbook can also serve as practical revision tool before any test (for older kids).
- Find books, unit studies, or lapbook lessons and brainstorm topics to cover (things you want your child to learn on this theme/book) – use the journalistic approach to write down some questions – Who? What? Where? When? Why? How?
Alternatively, you might choose to first read the book with your child and then decide on topics based on feedback from your child – what did he find to be most important or interesting in the book?; what did he not understand?; what did he find amusing?; etc.
- Find other resources that would add to making a great study, and jot it down! You might have a video-clip that would’ve explained something in a different way than you did, which would’ve put the light on for the child, but you might have forgotten all about it, hidden somewhere on your computer…
Resources can include lapbook (mini-book) templates (either general or theme-specific), notebook pages, coloring pages, pictures and stickers to decorate the lapbook with, games (boardgames, games for outside, or computer games) that will complement the topic, activities to complement the topic (e.g. make a clay pot, or a scavenger hunt), theme-related recipes (to make and enjoy), patterns for theme-related costumes (to use for acting out what happened in the study, e.g. a bush-hat and other clothing for a lion-hunter), theme-related experiments, educational video clips, etc.
- Determine what you can use as manipulatives for math, what art/craft project your child can do, and what nature study is found in the book/lesson. Make a list of vocabulary/reading words the child struggled with or did not understand during the reading, and include them as separate items in the lapbook.
- It doesn’t really matter when the cover of the lapbook is created, but it is good to have one that will identify what the lapbook is about. Let the child create his own cover – paint it, draw it, use stickers, or create a collage (see an example of this here); or make a copy of the cover of the book you used.
- Then divide all the mini-books, projects and activities into bite-sized goals for every day until the time you’ve determined to spend on this lapbook is complete. For example, don’t leave the vocabulary words for a specific day, but let the child define, write down, or draw one or two vocabulary words per day.
- When reading, viewing or discussing the material, write down any sentence structure or lines that the child finds amusing, that he questions, or repeats after you… have him do these for copywork.
Reading should be fun! Reading with different voices can result in a whole lot of giggling, and what better way to remember something?
- If you have clean minibook templates (ones that you have cut out of different colored paper and have no printing on), have your child decide what information he wants to place on the different paper folds. Also allow him to decide where to place the completed mini-books in the file-folder. If you’d like to have everything ready before you start compiling the lapbook (even before you start reading the material), open the file and introduce the mini-books to your child. This can serve as overview of the material you’re going to study, and will start up the gears in his head (get him thinking).
- At the completion of the lapbook, determine whether your child can answer and that he understands the questions you wanted him to learn from the book. He should be comfortable enough with the lapbook (theme/book studied) to give a presentation to the family, and he should be proud of his work.
For further narration (speaking skills), have your child briefly describe the main characters of the book (if any), or narrate a summary of the story, or reconstruct the ending of the book (if it was a story-type book); you can even let the child compile his own story using the facts he learned (if it was non-fiction). And for something artsy (if you don’t have an art project planned), have your child illustrate the narrated summary.
- If you want to integrate the lapbook (theme) with all subjects (which expands the lapbook), work out objectives for each subject – e.g. writing can consist of copywork or dictation, art can include illustrating, drawing and painting, crafts can include paper-art or making a model out of clay, photography can include the child finding the proper object and applying his photography skills to present the theme from a child’s point of view. All the subjects (history, geography, social studies, timelines, math, music, economics, art, science, puzzles, handwriting practice, language arts, reading, vocabulary, spelling, technology, foreign language, Bible, photography and even physical exercise) can be integrated into the lapbook theme. All it requires is a little thinking out of the box on your part.
Remember to compliment the child’s work, and remember to make the lapbook a fun project. Children will always forgive the words you speak to them, but they will never forget the way you make them feel. If you break the creation of a lapbook with a bad attitude, you can bet on struggling with your child later on to attempt doing anything related to learning and/or you.
So go, be creative, and have fun!


